
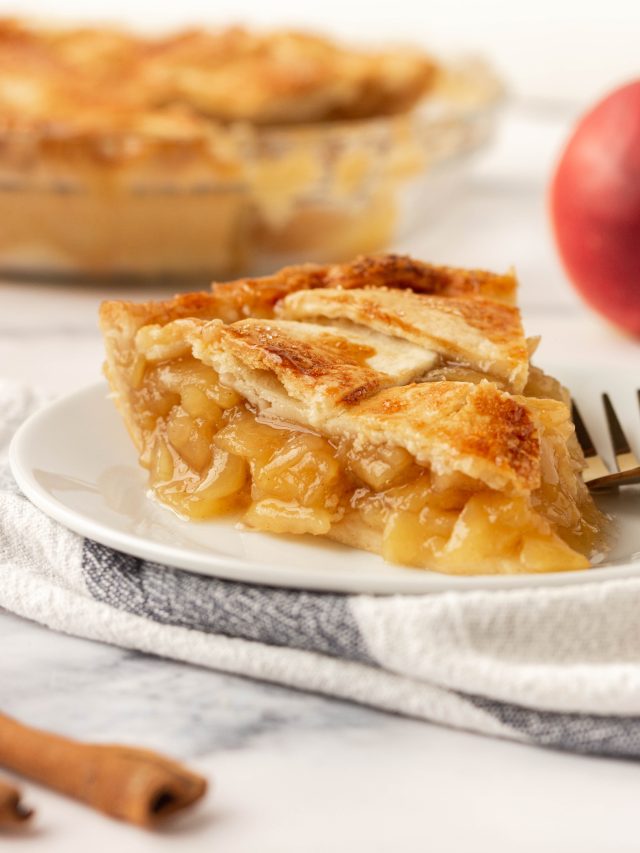
This Apple Slab Pie With Icing is easier and quicker to make than apple pie, but just as delicious! It features a no-chill flaky pie crust, a perfectly gooey apple pie filling, and a sweet buttery glaze on top.
It’s truly the Best Apple Slap Pie you’ll ever make, perfect for the Holidays and large crowds!

Best Apple Slab Pie With Icing
This was one of my first recipes I shared and many years and 5-star reviews later, I’m here to thank you for all the love this Apple Slab Pie Recipe got (and keeps getting!) 🙂
Why you’ll love this recipe:
- No-fail. I like to call this my “no-fail apple pie” because it’s pretty much an apple pie but much quicker and easier to make (and just as delicious… or maybe more because of the icing hehe).
- Gooey filling. I love gooey fruit pies and you probably know that if you’ve ever baked on of my pies (they’re all viral on Pinterest!) so you can expect an extremely gooey apple filling for this one too!
- No-chill crust. What makes this slab pie easier than a regular apple pie is the no-chill dough which comes together in just a few minutes and yes, it’s flaky!
- Icing. One of the best parts of this dessert? The icing! It’s thick, creamy, and buttery.
- Versatile. Roll the crust into any shape you want: rectangular, square, oval, heart-shaped. Bake it for any occasion: parties, gatherings, the Holidays, or just because!

Ingredients for Apple Slab Pie
Sugar. You’ll need both white granulated and brown sugar for the apple pie filling as well as powdered sugar for the icing.
Cornstarch to thicken the filling. I usually like to use a different starch for my fruit pies (and it always gives them that viral-quality) but when it comes to apples, I found that regular cornstarch is best.
Water for cooking the apples until tender.
Cinnamon for flavor.
Vanilla extract for flavor.
Nutmeg for flavor.
Apples. Some of the best apples for this type of dessert would be Granny Smith, Honeycrisp, or Golden Delicious or a mix of these. I sometimes just use whatever apples I have on hand, honestly, but those will guarantee you a nice texture and flavor.
Flour, all-purpose, for the no-chill dough.
Oil. Yes, oil. I usually stick to a classic all-butter Homemade Pie Crust but that type of dough requires chilling and it’s much more time and labor intensive which is why I chose an oil pie crust for this slab pie that’s supposed to be easier and quicker then apple pie! Don’t worry, it’s still flaky and good!
Milk, mainly for the icing.
Butter, for the icing, to add that delicious buttery flavor and to help it set when chilled.

How to make an Apple Slab Pie from Scratch
STEP ONE: Make the apple filling. In a large non-stick skillet, add the white sugar, brown sugar, cornstarch, water, cinnamon, vanilla, nutmeg, and salt. Mix until the cornstarch has dissolved then place over medium-high heat and cook for 5-6 minutes, stirring frequently.
Add in the sliced apples, lower the heat if necessary, and cook until the sauce has thickened to a syrupy consistency (about 15-20 minutes). The sauce shouldn’t be runny like milk or water but thicker (similar to maple syrup). Remove from the heat and allow to cool down for 30 minutes, meanwhile make the crust.
STEP TWO: Preheat the oven to 375F (190C).
STEP THREE: Make the pie crust. Add the sifted flour, sugar, and salt to a bowl. Give it a quick whisk, then create a well in the center. Pour in the oil and milk and mix until a dough starts forming. If the dough is too dry and crumbly, add 1 tablespoon of milk (or more, up to 2 tbsp) and mix. Transfer the dough onto a work surface and knead it a few times, then form into a ball.
STEP SIX: Bake for 35-40 minutes or until the crust is golden brown. Remove from the oven and allow to cool for a few hours. You can serve this slab warm, at room temperature or cold!

How Can You Tell If An Apple Slab Pie Is Done?
Your Apple Slab Pie is ready when the crust is golden brown. If some of the filling oozed out from the slab, it should have a jelly-like consistency!
Can you make this ahead of time?
Yes and there’s multiple steps you can make ahead of time. You can make the apple pie filling (step 1) up to 1-2 days ahead of time and keep it covered in the refrigerator until ready to use.
You can also make the pie crust (step 3) 1 day ahead, form it into a ball, wrap in plastic wrap and store it in the refrigerator overnight until ready to use (allow to come to room temperature before rolling out).
How Do You Store Apple Slab Pie?
Store your Apple Slab Pie in an air-tight container in the refrigerator for up to 4 days. Alternatively, you can cover the slab tightly with plastic wrap.

HAPPY BAKING!! I hope you'll love this Apple Slab Pie With Icing Recipe as much as I do!
PS: Please leave a comment and/or give this recipe a rating ⭐️⭐️⭐️⭐️⭐️ if you make it! Your comments make my day!! You can also tag me on Instagram @itsdamnspicy 🌈💘
More apple desserts you’ll love:
- Caramel Apple Roses with Puff Pastry
- Russian Pancakes with Apples (Oladi)
- Apple Cake with Sour Cream

Best Apple Slab Pie With Icing
Ingredients
For the Gooey Apple Pie Filling
- 1/2 cup + 2 tbsp (130 g) white granulated sugar
- 1/2 cup + 2 tbsp (130 g) brown sugar
- 2 tbsp (15 g) cornstarch
- 1 and 1/4 cups (310 ml) water
- 1 teaspoon ground cinnamon
- 1 teaspoon vanilla extract
- 1/4 teaspoon ground nutmeg
- 1/4 teaspoon kosher salt
- 3 lbs (1.3 kg) apples peeled and sliced into 1/4" thick slices
For the Flaky Pie Crust
- 3 cups (375 g) all-purpose flour sifted twice
- 3 tbsp (45 g) white granulated sugar optional
- 1/4 teaspoon salt
- 3/4 cup (170 ml) vegetable oil
- 1/3 cup (83 ml) milk or more if necessary
For the Vanilla Icing
- 1 and 1/2 cup (180 g) powdered sugar
- 4 tbsp (60 ml) milk
- 4 tbsp (56 g) butter melted
- 1 tsp vanilla extract
Instructions
- Make the apple filling. In a large non-stick skillet, add the white sugar, brown sugar, cornstarch, water, cinnamon, vanilla, nutmeg, and salt. Mix until the cornstarch has dissolved then place over medium-high heat and cook for 5-6 minutes, stirring frequently. Add in the sliced apples, lower the heat if necessary, and cook until the sauce has thickened to a syrupy consistency (about 15-20 minutes). The sauce shouldn't be runny like milk or water but thicker (similar to maple syrup). Remove from the heat and allow to cool down for 30 minutes, meanwhile make the crust.
- Preheat the oven to 375F.
- Make the pie crust. Add the sifted flour, sugar, and salt to a bowl. Give it a quick whisk, then create a well in the center. Pour in the oil and milk and mix until a dough starts forming. If the dough is too dry and crumbly, add 1 tablespoon of milk (or more, up to 2 tbsp) and mix. Transfer the dough onto a work surface and knead it a few times, then form into a ball.
- Roll out the pie crust. Divide the ball of dough into 2 equal parts. Place the first piece of dough in between two sheets of parchment paper and roll it out into a 10" x 14" rectangle, then remove the top sheet of parchment paper and use the bottom sheet to lift your pie dough and place it into a jelly roll pan.
- Add the filling. Spread the apple pie filling evenly on top of the crust, then roll out the second piece of dough in the same manner as the first and flip it on top of the filling. Trim and seal the edges to make sure the filling won't leak out, then cut a few slits into the top of the crust (I usually do 9).
- Bake for 35-40 minutes or until the crust is golden brown. Remove from the oven and allow to cool for a few hours. You can serve this slab warm, at room temperature or cold!
- Make the icing. In a medium bowl, combine the powdered sugar, milk, butter, and vanilla extract together and mix until fully combined. Pour the icing over the slab and use a spatula to spread it evenly. Allow the icing to harden up (optional), then slice and serve!

Mary McCauley says
In your pictures it looks like you might have prebaked the bottom crust. I know that’s often done with fruit pies. Do you recommend it for this one?
Bianka says
Hi Mary! No, the crust wasn’t blind baked for this one. You could do it, I guess, but I never felt the need to blind bake for this pie.
Margery kirner says
Just made this pie for tomorrow.Of course I had to taste the filling..Absolutely delicious!
Bianka says
Hi Margery! I’m so happy to hear that you loved it! Thank you for letting me know & Happy Thanksgiving Weekend!
Bianka says
Hey Dia! I’m so happy to hear that you loved this recipe, thanks for letting me know!
Bianka says
YESSS!! Happy to hear that you loved this recipe, Holly! Thanks for the feedback 🙂